In the first Create a Decent Website by ITE2 NAS Part 1 post, you have learned to set up your website. In this post, it will introduce how to operate Mobirise step by step. Starting from understanding the operation interface, set up the webpage, and website information. Let you able to create a decent website all on your own!

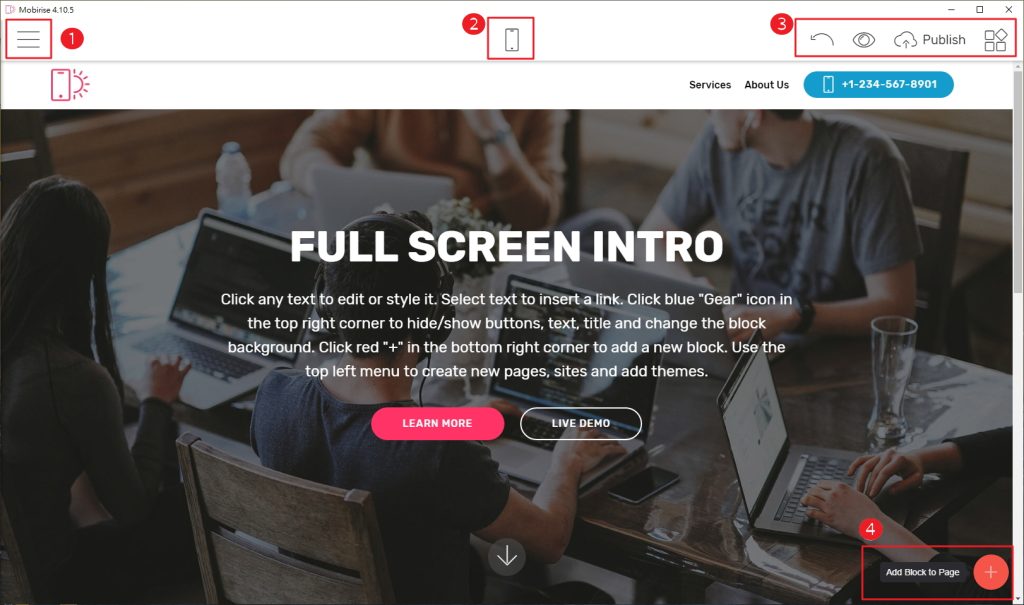
- Menu: Contains web pages, websites, accounts, extensions, help, and other items. Follow-up instructions will be provided for the pages that need to be set when creating a website.
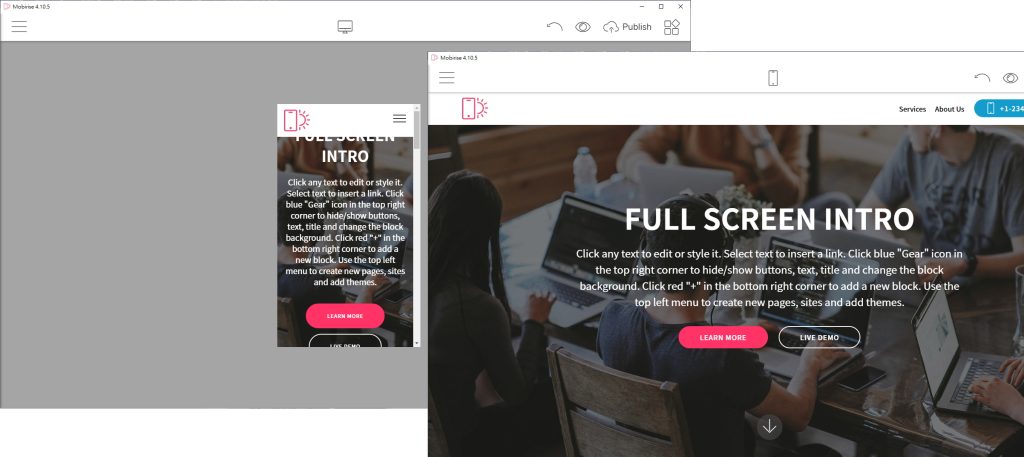
- Review Mode: Switch between mobile and desktop review mode.
 3. Function Menu: Contains items such as recovery, preview, release, and extensions.
4. Block Menu: Users can add blocks to the webpage. These blocks contain different functions, such as the menu, images, slides, price list, timeline, and so on. Except for the menu, which can only add one set, other blocks can add multiple sets if the user wants. Block detail descriptions will be introduced later.

Create a Decent Website by ITE2 NAS – Website and Web Page Information Settings
Pages in the Menu(Pages)
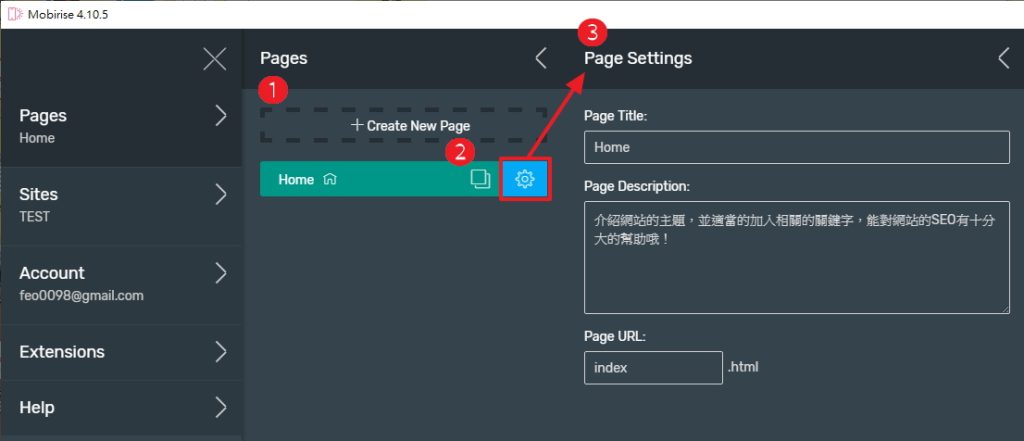
You can ❶ add new pages on the website, ❷ copy pages, or ❸ setup page data settings (including the page name, profile, file name, and so on).

Sites in the Menu(Sites)
Users can add and copy entire websites, setup website styles, website data settings, delete websites, or restore removed websites.
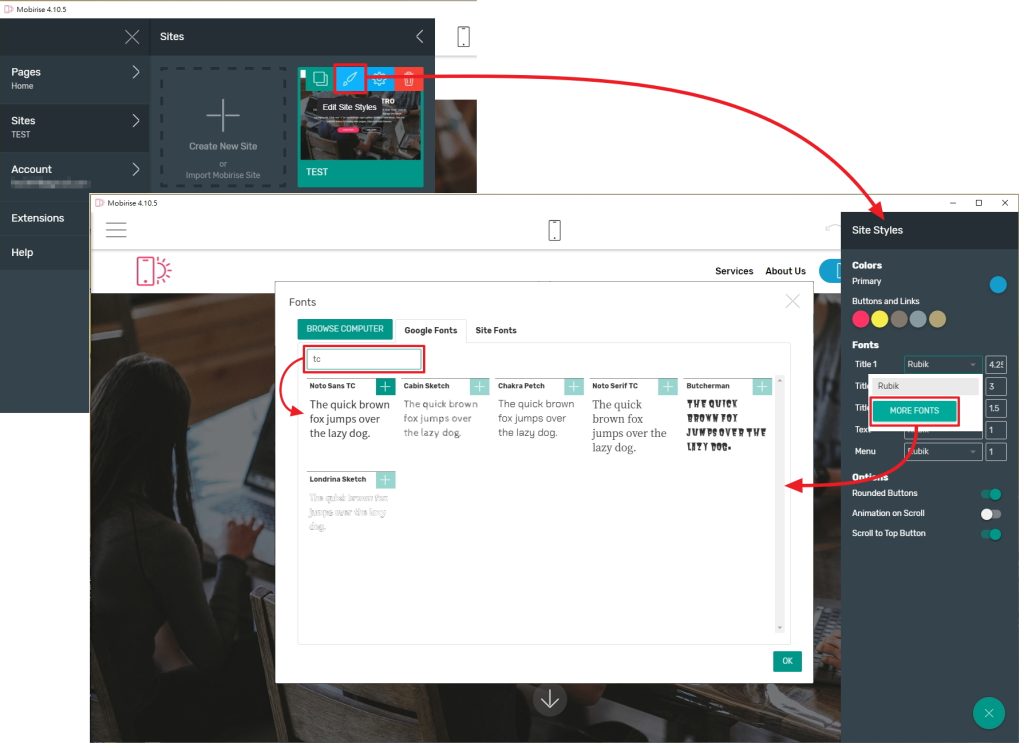
- Website style: Allows the user to design the overall website style, such as colors, fonts, and other functions (button rounded corners, dynamic effects when the page is scrolled, and the back button)
- The tone and function can be adjusted as required. If a user wants to use Chinese as fonts, click [MORE FONTS], and then select [Noto Sans TC] bold or [Noto Serif TC] bright on the Google Fonts tab. Of course, the user can also import fonts from the user’s computer through [BROWSE COMPUTER].

- Website data settings: Users can set up the website name, website history file, website title ICON, adjust image size, and so on.

The ICON of the website title will be displayed in the browser tab, as shown in the figure below.

So, we have completed the basic interface understanding and basic settings of the website and web page by now! Stay tuned for more posts!
