Backup is critical to everybody right now since everyone is using a computer. Not to mention the files in the computer, images, company data, school projects and so on. These data have been increased fast. However, lots of users usually do not have conscious about that and ignore the importance of backup. Moreover, sometime, things just happened, in that time, it will be too late to regret. That’s why you need a perfect backup app to help you, and that is ITE2 Center.
ITE2 Center is an app special designed for Windows 10. It has two main features, social media sharing and schedule differential backup. In this post, we will introduce you how to setup backup from ITE2 Center.
First – Download ITE2 Center
Please download your ITE2 Center in Microsoft Store.

After finish downloading, you can press Windows key and see the ITE2 Center in the program list.

Open ITE2 Center, and select [ backup/restore ], and let’s learn how to setup backup for your precious files!

How to backup your files from ITE2 Center?
Enter in the ITE2 Center and press the right down corner icon [ create ].

How to set back up in an immediate mode
There has two mode for setting up backup, if you want to back up your computer immediately, chose immediately mode. Next, set up your destination and the source route, then press the [ save ] icon on the right down corner.
- If your destination is an inside network, please enter your route [ //IP/root directory ]
- If your destination is an outside network, please enter your route [ //website address/root directory ] (Please note that destination NAS should open port 445)
In this post, we will use the outside network as an example.

[ Reminder ] If your chosen route has popped out the following message, please enter your NAS username and password for that route. Alternatively, you can enter your username and password in the backup setting column.

After you finish setting up, you can see the backup task have been created.

Then, press the [ save now ] icon in the right down corner, and you can see the notification pop out to let you know the backup process has been successful.

How to set back up in a schedule mode
When you want to setup a scheduled backup, you need to change mode to schedule first, then press [ set the schedule ] icon.

You can select the backup time range, schedule time and backup cycle in this page.

After you finish all the scheduled time setting and the files sources and destination setup, press [ save ] icon on the right down corner, and the backup process will be schedule successful.

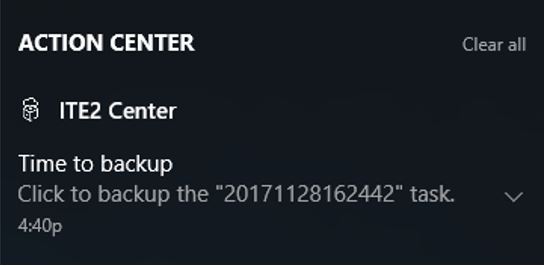
When it comes to the scheduled time, the action center will pop out the notification, click the backup icon and the files will be backup to ITE2 NAS.

Viewing the backup data
When the user finishes the first backup process, go back to ITE2 NAS to review backup data. All the backup data will be saved as [ computer name + project name + original route ] name, in case there was a significant amount of information, then the user can search their target files by this classification.

Also, when ITE2 Center user is backing up the repeat files, ITE2 Center will automaticly store data in a differential backup mode.
User can find the history folder under the project name route. In the history folder, ITE2 Center will only backup those updated or new files, and won’t store same data that have been saved to avoid the space waste.

When the user is viewing their data, they can find their updated file has a different setup time, and the other repeat files are still reminding the same.

How to restore losing files from ITE2 Center?
Oops! I just accidentally deleted my file! What can I do?
It does’t matter, let the ITE2 Center help you to restore the missing files!

In ITE2 Center backup list, user can locate which backup they want to restore, then select the [ restore ] icon.

Select the history that you need to restore, and press [ restore now ], the restore process will start immediately.

Then you can see all the missing files are back!

